
If you have an RV, you may know how to do RV brake repair. This will be useful while you are on a trip and no service center nearby.
Depending on the frequency of use and distance traveled, should inspect RVs at least once per year. Before going on a tour, you also need to check if all your RV systems include the wheels, tires, and brakes, are in good condition or not.
Electric brakes are the most popular brakes used on campers and trailers. Some RVs use hydraulic brakes. Suppose your electric brake is not functioning correctly. To solve the brakes problem, you need to know how to identify them first and then repair breaks.
Never avoid even a small problem with the brake; it may cost you with life. Here we will tell you about inspect the electric brake and how to repair it.
RV Brake Repair: How to do it
There are several reasons the brakes on your RV may not be working. Some of the causes and their solution are given step by step below.
Check and Repair the Trailer Connector
Step 1
First, you need to open the trailer connector. Remove a small screw on the side of the connector. Then slide the outer cover back.
Step 2
After that, you need to find the wire in the connector that controls the electric brakes. The connector needs to plug into the connector of the tow truck.
Step 3
Then, take the test light’s ground clip. That must be of 12-volt. Then it would be best if you connected it to the bare metal portion of the connector. Assist a person in pressing the brake pedal.
Step 4
The trailer connector touches the probe on the test light on the screw where the wire controls the brake connects.
After touching the probe, If the test light does not light up, there is a connector problem. It would be best if you replaced the connector. There are instructions to follow to replace the connector with the new one.
Check and Repair the Electric Brake Wiring
If the test light of the ground clip light up, there is no problem with the connector. The trailer connector is working. There may be a problem with the wiring between the brakes and controller. Now you should check the brake wiring.
Step 1
Open the tow vehicle connector as the trailer connector.
Step 2
Identify the cables that control the electric brake at each wheel. Check the backing plates of the wheel where the wire enters. Then connects both connectors.
Step 3
Have an assistant depress the brake pedal.
Step 4
Then connect the ground clip on the test light to the RV’s frame. At each wheel, touch the probe to pierce the insulation on the wire.
If the light of the ground clip does not light, there is a fault in the wheel and connector’s wiring. Examine the wiring. Repair the wire where it brakes. If repairing is not possible, replace the cables as needed.
Check and Replacing the Brake Drum Magnet
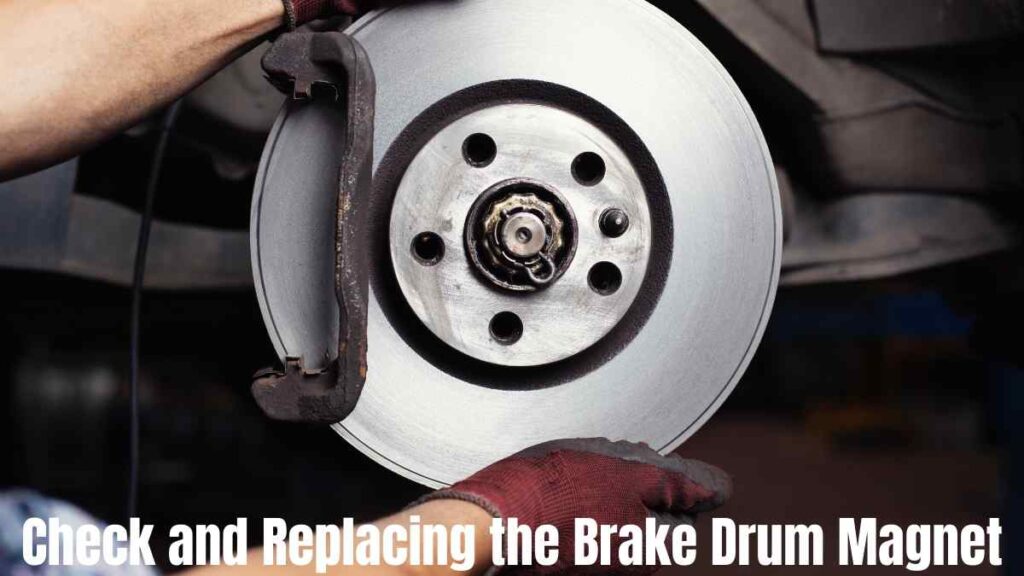
If the test light on the clip gets light, but the brakes will fail to perform, the brake drum magnet is not working conditions and needs replacement.
Check The Brake Drum With A Compass
Step 1
Have an assistant press the brakes via the brake controller.
Step 2
Then take the compass near the brake drum and move it.
Step 3
When the compass starts to spins hat indicates the bake drum magnet is working well. If not, there is a problem with the magnet.
Remove The Brake Drum Magnet
Step 1
At first lower the front of the trailer and place a jack stands under the rear frame. lift the front enough so that the wheels lift off the ground
Step 2
Remove the tires and wheel. Then remove the grease cap on the center of the hub, then the cotter pin, and the castle nut.
Step 3
After that, remove the brake drum. No need to remove the outer wheel bearing. It will come off with it the brake drum.
Step 4
The magnet is attached to one of the brakes in general. Examine and remove this shoe to disconnect the magnet.
Step 5
Take a photo of the brake block before apart them if you do not want any problem during reinstallation.
Step 6
Remove the springs at the top of the backing plate. The springs connect the brake block and the brake drum backing plate. Then Remove the self-adjuster and spring at the bottom of the backing plate.
Step 7
At last, Cut the wires connected to the magnet and remove the magnet.
Installing A new Brake Drum Magnet
For installing a new magnet in a brake drum, you need to buy a new magnet. For replacing any parts of the brake, you need to know how to find RV brake parts for old motorhomes.
The installation process of a new magnet is described below.
Step 1
At first, connect the wires to the new magnet with barrel crimp connectors. And then attach the magnet to the brake.
Step 2
Then reinstall the self-adjuster. Afterward, attach the pin and springs again at their place to connect the brake block with the brake backing plate.
Step 3
After that, reinstall the brake drum and wheel bearing and reinstall the castle nut properly.
Step 4
You need to install a new cotter pin and reinstall the grease cap in the hub.
Step 5
Finally, reinstall the wheel and tires.
You May Know
There are several things you also need to know about brake while inspecting problems with breaks. To repair, you may need to replace different parts of the brake.
Sometimes only repairing is not enough for RV brake; they may need to remove and replace it with a new brake. To avoid any unwanted situation because of the brake, you should know how often RV brakes need to be changed.
If you are not an expert, you should be very careful about repairing and changing the brake parts. It would be best if you take expert advice or bring your RV to the service center.
Frequently Asked Question:
Answer: RV brakes last depending on the distance the RV travel. You may need to check the RV brake once a year. The best time duration for changing an RV brake is not more than 12 months or one year. The brakes also last depending on the travel distance; the brake may last for 12000 to 15000 miles.
Answer: Electric brake is the most used brake in RVs. The simple things that you can check of an electric brake are
1.First, need to check the vehicle and trailer connectors. Open the connectors of the brake. Then Place a test light’s ground clip to the bare metal portion of the RV connector. Then press the break.
2.Then, test the wire on the vehicle and RV connectors and the brake magnets,
3.Afterward, check the brake controller and its wiring by using a circuit tester.
4.Finally, you will need to check the brake magnets.
Conclusion
Checking and repairing RV brakes, tires, wheels are essential at least once per year. Depending on the miles the RV travels, regularly checking the brakes will avoid any massive unwanted loss.
If you want to check your RV brakes at home and repair the Brakes, it is possible. But the process is not easy. So if you are a beginner, need expert help to test the brake and solve the problem.
In this article, we discuss some simple steps of the checking process for RV brake repair here. For more information and to do the job properly you need to go to experts.